Achieving flawless, healthy skin doesn’t always require expensive spa visits or high-end products. With the right at-home skin treatment tips, you can nourish and revitalize your skin using simple, effective methods. From DIY masks to expert-backed routines, these treatments are perfect for giving your skin a radiant glow—right from the comfort of home.
Last year, I spent $1,200 on professional facials before a friend asked me a simple question: “Have you tried doing treatments at home?” I laughed it off—how could my bathroom routine possibly compare to what my esthetician does?
Six months and many experiments later, I’ve eaten my words. My skin looks better than ever, and my wallet is significantly happier. The secret wasn’t expensive products or complicated techniques—just learning how to transform my hasty skincare routine into an intentional treatment ritual.
If you’ve ever felt that professional-level skin results were out of reach without professional prices, this one’s for you.
🪞 Creating Your Bathroom Sanctuary (Even in a Tiny Apartment)
Let me paint you a picture of my first “at-home facial”: Standing in my cluttered bathroom, slapping on products while checking emails, with my roommate knocking every five minutes asking when I’d be done.
The results? Completely underwhelming.
“Your mental state directly affects your skin,” my esthetician Morgan laughed when I complained. “Stress hormones trigger inflammation and oil production. The relaxation isn’t just fluff—it’s biology.”
Now my Sunday night ritual looks completely different:
- Phone in another room (this was HARD at first!)
- Counter cleared except for products I’m using
- $3 lavender candle from Target
- Spotify spa playlist playing quietly
- Clean washcloth and headband ready
My boyfriend teased me until he saw the difference in my skin—and my mood. “You’re nicer on facial nights,” he observed. Can’t argue with that.
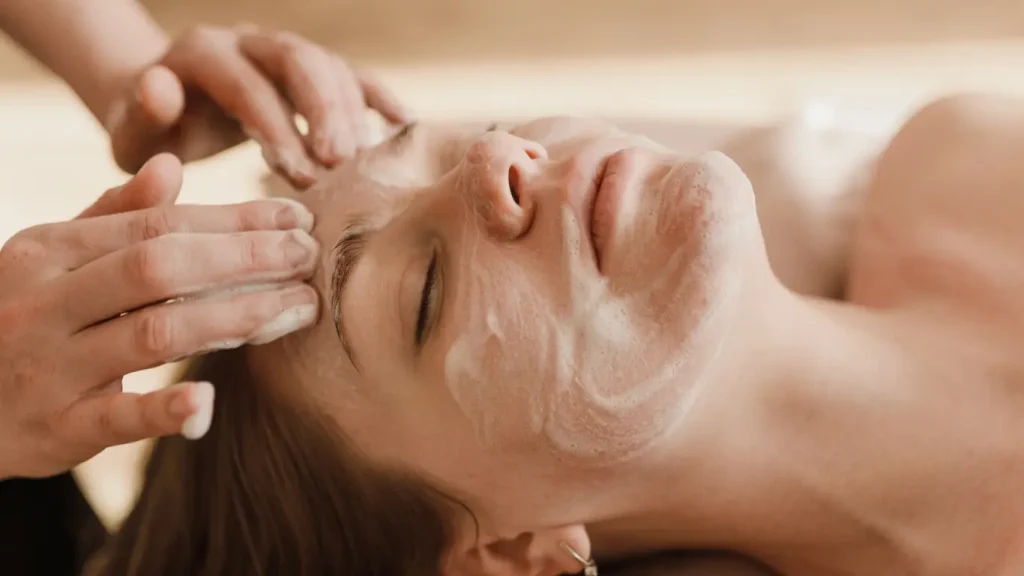
🧼 The Clean Slate Secret That Changed Everything (At-Home Skin Treatment Tips)
My biggest facepalm moment came during a virtual consultation when my dermatologist asked how long I spent cleansing.
“Um…maybe 15 seconds?” I admitted.
Her exasperated sigh said it all. “Professional facials start with a solid 5-10 minutes of cleansing. You’re trying to apply treatments to skin that’s still covered in sunscreen, pollution, and dead cells.”
Game-changer #1: Double-cleansing. I massage an oil cleanser into DRY skin first (this was counterintuitive but works amazingly). I use DHC Deep Cleansing Oil, but my sister uses straight unscented jojoba oil from Trader Joe’s with identical results.
Game-changer #2: The 60-second rule. I literally set a timer and spend a full minute with my second cleanse. I’ve tried fancy cleansers but honestly, CeraVe Hydrating works perfectly and costs $15.
The first time I tried this thorough cleansing, I thought, “My face has never been this clean in my LIFE.” My products suddenly worked better because—surprise!—they could actually reach my skin.
🧽 My Exfoliation Disaster (And How You Can Avoid It)
Picture this: Me, excited about my new scrub, rubbing vigorously in circles because “that’s how they do it in spa commercials.” Cut to: My horrified face the next morning—red, raw, and peeling for days.
Physical scrubs can be fantastic or disastrous, depending on how you use them. Now I follow these rules:
For sensitive or breakout-prone skin (like mine): My foolproof DIY: 1 tablespoon of ground oatmeal (I pulse regular oats in a blender) mixed with enough honey to form a paste. I apply with WET fingertips in GENTLE circular motions for 30 seconds, then rinse.
When my skin needs more: I switched to chemical exfoliants, which dissolve the “glue” holding dead cells rather than scrubbing them off. The Ordinary Lactic Acid 5% was my gateway product—gentle enough that I didn’t have another red-face disaster.
The most important lesson? More isn’t better. I exfoliate twice weekly, MAX. My skin changed dramatically when I stopped over-exfoliating.
My coworker Jane didn’t believe me until she tried scaling back her daily scrubbing to twice weekly. “I kept using harsh scrubs because my skin was flaky,” she told me. “Turns out I was CAUSING the flakiness!”
🧴 Face Masks: When I Learned to Listen to My Skin
My medicine cabinet used to be a graveyard of half-used masks purchased during late-night Instagram scrolling sessions. Now I have three go-to options and choose based on what my skin needs that particular day.
When my skin feels tight and looks dull (usually during winter or after flights): My 3-ingredient moisture bomb: half an avocado mashed with a spoonful of plain Greek yogurt and a squeeze of honey. Twenty minutes with this on makes my skin look like I drink a gallon of water daily (I definitely don’t).
When my T-zone is congested and bumpy: Aztec Secret clay mask mixed with apple cider vinegar instead of water (important distinction—water doesn’t activate it properly). The first time I removed this mask, I actually gasped at how much clearer my pores looked.
When my skin is irritated or red: Refrigerated oatmeal mask. Yes, I literally cook plain oatmeal, let it cool completely, then apply it. My boyfriend walked in on me doing this and slowly backed out of the bathroom without comment.
The secret to masks? Take. Them. Off. On. Time. I used to think leaving masks on longer would make them work better. Instead, I ended up with irritated skin. Now I set a timer and follow directions exactly.
💧 The Steam Facial That Made Me Feel Like a Genius (At-Home Skin Treatment Tips)
My most luxurious discovery was face steaming—something I’d only experienced during professional facials.
My first attempt was… creative. I boiled water, poured it in a bowl, then tried to hold my face over it. The steam was either too hot or disappeared too quickly, and I gave up.
Then my friend Maria showed me her technique:
- Use a deeper bowl so the steam lasts longer
- Add a few sprigs of fresh rosemary or chamomile tea bags
- Position your face about 10 inches away (not 5 inches like I was trying!)
- Create a “tent” with a bath towel over your head
- Steam for 5-7 minutes max
The first time I did it properly, I was shocked at how much more absorbed my serums and masks afterward. My pores looked visibly cleaner, and the whole experience felt like a $100 spa treatment for the cost of boiling water.
Safety confession: I got overzealous once and steamed too long, too close. My rosacea-prone cheeks turned bright red and stayed that way for hours. Lesson learned—gentler is better.
💆 Face Massage: The Free Anti-Aging Trick I Almost Missed
When my friend showed up with jade rollers and gua sha tools, I rolled my eyes hard. It seemed like the epitome of Instagram-bait skincare.
“Just try it on half your face,” she insisted.
Fifteen minutes later, the difference was undeniable. The side she’d worked on looked lifted, less puffy, and somehow brighter. I immediately ordered my own tools.
You don’t need fancy stones to start (though they do feel amazing). Here’s my basic routine using just clean hands and a few drops of facial oil:
- Apply facial oil for slip (I use The Ordinary Squalane, $8)
- Use knuckles to gently stroke upward from jawline toward ears
- Press fingertips under cheekbones and gently slide outward
- Circle temples with medium pressure
- Tap around eyes very gently with ring fingers
I do this for just 3-4 minutes while watching TV, but the circulation boost is immediate. My mom actually noticed during our weekly FaceTime—”Your face looks different…more awake?”—before I’d told her about my new routine.
🌙 The Moisturizing Step I Was Doing Completely Wrong (At-Home Skin Treatment Tips)
After all my careful cleansing and treatments, I was sabotaging everything with one critical mistake: not sealing it in properly.
I was slapping on a light moisturizer and calling it done. Then I’d wake up with mysteriously dry skin despite all my hydrating treatments.
My breakthrough came from a Reddit skincare forum where someone explained the concept of “transepidermal water loss”—basically, all that wonderful hydration evaporates without something to seal it in.
Now my final step depends on my skin’s needs:
When my skin is normal (rare in winter): A simple gel-cream moisturizer like Neutrogena Hydro Boost
When my skin feels tight or looks dull (most of the time): Moisturizer followed by 2-3 drops of facial oil pressed (not rubbed) onto my skin
For extremely dry periods: A thin layer of CeraVe Healing Ointment on my cheeks and forehead
This final step transformed my results—I wake up with plump, glowing skin instead of wondering where all my expensive serums went overnight.
🌿 Breakout 911: My Emergency Toolkit
Despite my best efforts, hormonal breakouts still happen (thanks, chin area). After trying countless overnight “miracle” treatments, I’ve found three approaches that actually work:
For those deep, painful spots that feel like they’re forming under the skin: Ice. Seriously. I wrap an ice cube in a thin cloth and hold it on the spot for 30 seconds on, 30 seconds off, for about 5 minutes. The difference in inflammation by morning is dramatic.
For whiteheads that have already formed: Hydrocolloid patches (I use the CosRx ones) applied to clean, dry skin overnight. Peeling these off in the morning to reveal all they’ve absorbed is disgustingly satisfying.
For the red marks left behind: Niacinamide serum applied consistently. The Ordinary makes one for about $6 that faded my post-breakout marks within weeks instead of months.
I used to attack breakouts aggressively with drying treatments, creating flaky patches that were harder to cover than the original pimple. This gentler approach actually heals them faster with less evidence they were ever there.
⏳ My Realistic Treatment Schedule (After Many Failed Attempts) (At-Home Skin Treatment Tips)
My first enthusiasm for at-home treatments had me doing masks daily and exfoliating every night. My irritated, sensitized skin quickly showed me the error of my ways.
After much trial and error, here’s the sustainable schedule that’s given me the best results:
- Monday/Thursday: Chemical exfoliation night with The Ordinary Lactic Acid
- Wednesday: Quick refresh with a hydrating sheet mask while I watch TV
- Sunday: Full spa treatment with cleansing, steam, mask, and facial massage
- Daily: Gentle cleansing, serums targeted to my concerns, moisturizer, SPF (morning only)
I use the calendar app on my phone to remind me of treatment days because I found myself either forgetting or doing too much. This balanced approach gives my skin time to recover between treatments.
My boyfriend now knows that interrupting Sunday night facial time means risking his life. Some boundaries are important!
🧴 The Daily Non-Negotiable I Finally Embraced
I resisted daily sunscreen for YEARS. It felt heavy, sometimes broke me out, and seemed unnecessary on cloudy days or when I was mostly indoors.
Then my dermatologist showed me side-by-side photos of identical twins—one had worn daily SPF for 20 years, and one hadn’t. The difference was more convincing than any article I could have read.
Finding the right formula was my breakthrough:
- Biore UV Aqua Rich Watery Essence feels like nothing on my skin
- Supergoop Unseen is completely invisible on my friend with deeper skin
- Black Girl Sunscreen is my sister’s holy grail for darker complexions
I keep travel sizes everywhere—purse, gym bag, car—so I never have an excuse. The bonus I didn’t expect: my skin tone has become more even since I started this habit, and old dark spots are fading faster.
💡 The Truth About Transformation (At-Home Skin Treatment Tips)
The most valuable lesson from my skincare journey isn’t about products or techniques—it’s about expectations and patience.
Those dramatic before-and-after photos online? They’re usually taken months apart, not days. Real skin transformation is gradual, and that’s okay.
My progress wasn’t linear. I had days when my skin looked worse before it looked better. I wasted money on trendy products that did nothing. I got impatient and overdid treatments that set me back.
But showing up consistently for my skin has paid off in ways I didn’t expect. Yes, my complexion is clearer and brighter—but more importantly, these rituals have become precious moments of self-care in an otherwise hectic life.
Start with just one or two practices that speak to your specific skin needs. Master those before adding more. Your skin will thank you with a natural radiance that builds your confidence from the inside out.
What’s your biggest skin challenge? Have any game-changing at-home treatments worked for you? Share in the comments—we’re all figuring this out together!
Also Read: 10 Brighter Skin Tips Backed by Experts & Winter Skin Care Routine to Shine Bright for more seasonal guidance to complement your at-home treatments.